Avenue Decor Avenue Decor

How to Repair Scratches on HPL Laminate Sheets?

Time:2026-09-25 Author:Amelia
0%

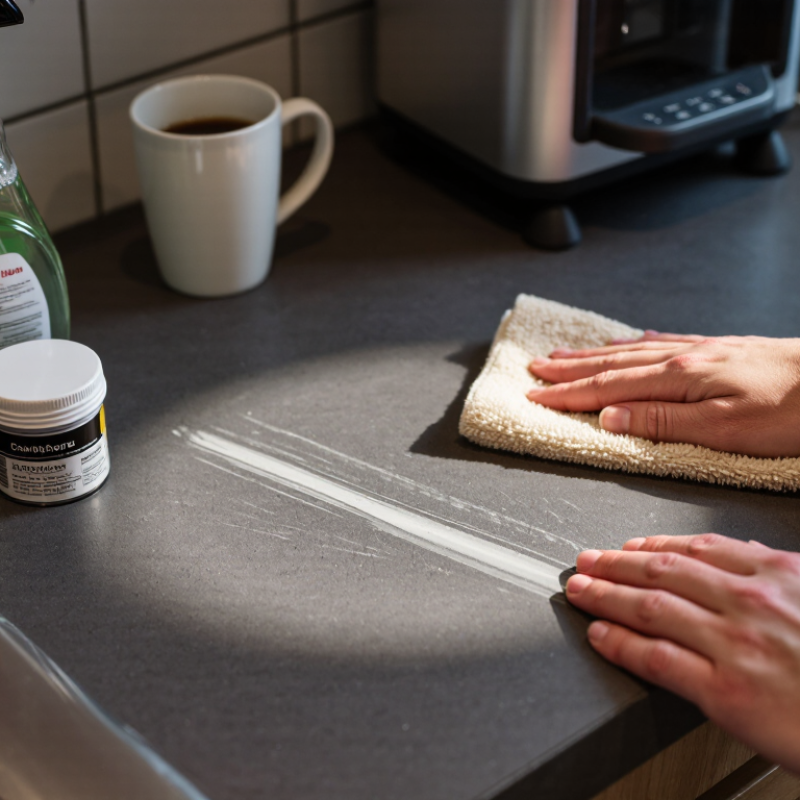
High-pressure laminate (HPL) sheets are valued for their hard, smooth surfaces, but daily use can leave visible scratches. A dragged mug, gritty dust beneath a small appliance, or a sharp-edged object may create a pale line across a dark countertop. Before trying to fix it, inspect the mark in good light and wipe the area with a soft, damp cloth. Dirt can resemble damage. That distinction matters.

How to repair scratches on HPL laminate sheets? The right approach depends on whether the mark sits on the surface or cuts through the decorative layer. Minor scuffs may respond to gentle cleaning, while shallow scratches can sometimes be blended with a manufacturer-approved, color-matched repair product. Deep cuts, chipped edges, and exposed core material usually need more than a touch-up. Not every mark disappears. Avoid rough scouring pads, aggressive solvents, and improvised sanding; they can dull or damage the finish. Test any repair product on a hidden spot, and follow its instructions carefully. A repair may remain slightly visible, especially under angled light. This guide explains how to assess the damage, choose a suitable repair method, and protect the sheet afterward, while keeping expectations realistic. One easy detail to miss is the source of the scratch: remove nearby grit before using the surface again.
How to Repair Scratches on HPL Laminate Sheets?

Identify the Scratch Type and Assess Its Severity

Before reaching for filler, identify the scratch type and measure its severity. Clean the HPL laminate sheet with a soft cloth and mild soap. Dry it completely. Dust can make a shallow mark look much worse.

Inspect the surface under a side light. A light scuff usually changes the sheen but does not break the decorative layer. A shallow scratch catches a fingernail slightly. A deep gouge exposes a lighter core, while a chip may show a sharp missing edge. Run your fingernail gently across the mark. Do not press hard.

A surface scuff may respond to careful cleaning and a compatible laminate polish. Stop if the color becomes uneven. For a shallow scratch, use a color-matched repair wax or laminate filler, applied with a plastic spreader. Remove excess material before it hardens. Deep damage needs more caution. Sanding can enlarge the damaged area and create a dull patch around it. I once underestimated a narrow gouge because it looked minor from above. The side light showed that the decorative layer had already failed.

Test any cleaner, polish, or filler on an unseen area first. HPL surfaces vary in texture, gloss, and color depth. If the core is swollen, the sheet has lifted, or the damaged area sits near an edge, replacement may be more reliable than cosmetic repair. Do not force a perfect result from a surface that has lost its protective layer.

Clean and Dry the Scratched HPL Surface

How to Repair Scratches on HPL Laminate Sheets?

Before repairing a scratch, clean the HPL surface carefully. Remove dust with a soft, dry microfiber cloth. Then use warm water and a small amount of neutral detergent. Avoid abrasive powders, scouring pads, and solvent-heavy cleaners. They can enlarge the scratch or dull the decorative layer.

Wipe in straight lines, not circles. This makes residue easier to detect. Rinse the cloth, wring it well, and remove soap traces. Dry the surface immediately with a clean towel. The U.S. Environmental Protection Agency recommends drying wet materials within 24 to 48 hours to reduce moisture-related microbial growth. HPL resists surface moisture, but water can still enter exposed edges or damaged joints. NEMA LD 3 performance guidance also emphasizes proper surface care and resistance testing under controlled conditions. These standards do not make careless cleaning harmless.

Tips: Check the surface under a bright, angled light. It may reveal residue mistaken for scratching. Never apply repair wax to a damp panel. I have seen moisture trapped beneath filler, creating a cloudy patch later. Let the sheet dry fully, preferably for several hours, before using a color-matched repair compound. Test the cleaner on an unseen area first. Small mistakes remain possible, especially on textured finishes.

Choose a Repair Method for the Scratch Depth

How to Repair Scratches on HPL Laminate Sheets?

Choose a Repair Method for the Scratch Depth

Hairline scratches usually affect only the decorative surface. Clean the area with a soft cloth and diluted neutral detergent. Dry it completely. Then apply a color-matched laminate repair paste with a plastic card. Use very little material. Excess paste can leave a raised, shiny patch. My first repair often looked too glossy. Lightly buffing the edge helped, but aggressive rubbing created a second mark.

Medium scratches may expose the printed layer or a pale core. For these, use a hard-wax repair stick or a professional color-matching filler. Warm the filler gently, press it into the groove, and level it with a non-metal scraper. EN 438-2:2016 evaluates laminate scratch resistance under controlled loads, yet household damage rarely matches laboratory conditions. Depth matters more than appearance alone. Check the scratch under angled light.

Deep scratches that reach the substrate need a different approach. Remove loose fragments, fill the cavity, and rebuild the surface in thin layers. A two-part repair filler can provide better hardness, but it may not reproduce the original texture. Do not sand through the surrounding decorative layer. The 2023 Global Decorative Laminates Market analysis by Grand View Research reported continued demand for durable interior surfaces, but durability does not mean invisibility after damage. If the core is swollen, cracked, or exposed across a wide area, replacing the sheet is usually more reliable than repeated cosmetic repairs.

Repair Minor Scratches with a Color-Matched Filler

Minor scratches on HPL laminate sheets can often be improved with a color-matched repair filler. Clean the area with a soft cloth and mild cleaner, then let it dry completely. Dust or moisture can keep filler from bonding evenly. Check the scratch under good light before choosing a shade; the surface may look different beside a window than under indoor lighting.

Test the filler in a hidden spot if possible. A close color match matters, but matching a printed grain or speckled pattern is harder. Apply a small amount with a plastic spreader, pressing it gently into the scratch. Less is safer. Wipe away excess before it hardens, following the filler’s instructions. Avoid metal blades and abrasive pads, which may leave new marks on the laminate.

Let it cure. Once set, inspect the repair from several angles and clean off any residue with a soft cloth. If the filler sits slightly proud, level it only as its instructions allow; aggressive sanding can dull the surrounding finish. A repaired scratch may remain faintly visible, especially on glossy or patterned sheets. That limitation is easy to overlook when focusing only on color. For deep gouges, swollen edges, or peeling laminate, filler is unlikely to restore a durable surface.

How to Repair Scratches on HPL Laminate Sheets? - Repair Minor Scratches with a Color-Matched Filler

Scratch Condition Recommended Repair Material Suggested Abrasive Application Method Typical Drying Time Expected Appearance Important Precaution
Light surface mark with no visible color loss Laminate cleaner or a soft polishing product suitable for decorative surfaces Usually none; use a soft microfiber cloth Clean the area and gently buff in the direction of the surface pattern No curing period normally required The mark may become less visible or disappear Do not use abrasive powders or steel wool
Minor scratch with a shallow groove Color-matched laminate repair filler or hard-wax filler Fine abrasive pad or approximately 600–800 grit paper, used lightly Clean, apply a small amount of filler, level with a plastic card, then remove residue Follow the filler instructions; many products set within several minutes A close color match can make the repair difficult to notice Test the color on an inconspicuous area first
Scratch exposes a lighter decorative layer but does not reach the substrate Tinted repair wax, touch-up compound, or color-matched filler Fine abrasive pad only if required for leveling Fill the damaged line in thin layers and wipe excess from the surrounding surface Allow the material to harden fully before normal use The scratch color is reduced and the surface becomes more uniform Avoid spreading filler over textured areas where residue may remain
Several short scratches in one small area Color-matched filler combined with a compatible surface touch-up coating Fine abrasive pad; avoid aggressive sanding Clean, fill the deeper lines, level the area, and apply a very thin touch-up layer if needed Depends on the coating; keep the area dry until fully cured Improved color consistency, although the repair may remain visible at an angle Use thin coats to prevent a raised or glossy patch
Deep gouge, chipped edge, or exposed core material Two-part repair compound or professional laminate restoration material Only as directed by the repair-material manufacturer Remove loose material, rebuild the damaged area, level it, and retouch the color Often longer than simple wax or filler; allow complete cure A functional repair is possible, but an invisible finish is less likely Consider replacing the panel when damage affects a large or highly visible area
Scratch near a sink, joint, or exposed edge Water-resistant repair filler compatible with the laminate substrate Fine abrasive pad, if needed Dry the area thoroughly, fill the defect, level it, and seal vulnerable exposed material when appropriate Keep water away until the repair has fully cured The repair helps reduce moisture entry and improves the visual finish Do not trap moisture beneath the filler

General repair sequence: Clean and dry the surface, identify the scratch depth, test the color match, apply the filler sparingly, level the repair, remove residue, and allow the material to cure before cleaning or using the surface.

Blend, Finish, and Protect the Repaired Area

Repairing scratches on HPL laminate sheets starts with restraint. Deep cuts may expose the core, while light marks often need only careful blending. Clean the damaged area with a soft, damp cloth and a mild cleaner. Let the surface dry completely. Moisture can weaken the repair.

Use a color-matched laminate repair compound or hard wax suitable for the sheet. Apply a small amount with a plastic scraper, pressing it across the scratch rather than along it. Build thin layers. This reduces raised edges and makes the color easier to control. Blend the repaired spot into the surrounding pattern using short, gentle strokes. Do not chase perfect color immediately. Laminate patterns change under different light.

After the filler firms up, level it carefully with a clean plastic edge. Avoid metal tools, which can create fresh marks. For shallow repairs, a fine polishing pad may soften the transition. Test it on an unseen area first. Excessive rubbing can dull the factory finish. That mistake is easy to make.

Protect the repaired area from standing water, sharp objects, and abrasive pads. Use a soft cloth for routine cleaning. Place felt pads beneath frequently moved items. Keep hot cookware on a suitable trivet. Do not seal the surface with an untested coating; it may change the sheen or attract dirt. Inspect the repair after several days. If the color still looks obvious, the blend may need a lighter second layer rather than more filler.

How to Repair Scratches on HPL Laminate Sheets?

Blend, finish, and protect the repaired area with a controlled, step-by-step process.

The chart shows practical planning estimates for a small localized repair: cleaning and inspection, filling the scratch, leveling the repair material, blending the color and texture, and applying final protection. Actual time depends on scratch depth, repair material, surface texture, and curing requirements.

FAQS

How should I clean a scratched HPL surface before repairing it?

Remove dust with a dry microfiber cloth. Wipe with warm water and a little neutral detergent. Rinse away soap, then dry the panel with a clean towel. Avoid scouring pads and abrasive powders.

How can I tell whether a mark is a scratch or residue?

Check the surface under bright, angled light. Wipe it in straight lines and look again. Let the panel dry fully before applying filler. Damp repairs can turn cloudy.

What works for a hairline scratch?

Use a small amount of color-matched repair paste. Spread it gently with a plastic card, then remove excess. Too much filler can leave a shiny, raised spot. I learned that the hard way.

How should I repair a scratch that reaches the pale core?

Try hard wax or a suitable repair filler. Press a little material into the groove and level it with a plastic scraper. Build thin layers. Check the color under different lighting.

What if the scratch is deep or wide?

Remove loose fragments and fill the cavity in thin layers. A two-part filler may feel harder, but it might not match the original texture. If the core is swollen or cracked, replacing the sheet is often more reliable.

Which tools should I avoid during repair?

Avoid metal scrapers, abrasive pads, and aggressive sanding. They can create fresh marks or damage the surrounding decorative layer. Use a clean plastic edge instead. Go slowly.

How can I blend the repair without dulling the finish?

Use short, gentle strokes and only a small amount of compound. A fine polishing pad may soften the edge of a shallow repair. Test it somewhere hidden first. Too much rubbing can dull the finish.

How do I protect the repaired area afterward?

Keep standing water and sharp objects away. Clean with a soft cloth, add felt pads beneath movable items, and use a trivet for hot cookware. Inspect the spot after several days; a lighter filler layer may work better than adding more.

Conclusion

How to repair scratches on HPL laminate sheets? Start by examining the surface carefully to determine whether the damage is a light scuff, a shallow scratch, or a deeper cut that has affected the laminate layer. Clean the area with a soft cloth and a mild, non-abrasive cleaner, then allow it to dry completely. A clean, dry surface makes the damage easier to evaluate and helps the repair material adhere properly.

Select a repair method that matches the scratch depth. Minor scratches can usually be filled with a color-matched laminate filler applied in a thin layer. Deeper damage may require several careful applications to restore the surface evenly. After the filler has cured, gently remove excess material, blend the repaired area with the surrounding finish, and smooth it without creating further marks. Finally, protect the repaired section by keeping it dry, avoiding harsh cleaners, and using suitable care practices to help preserve the HPL laminate’s appearance.

Amelia

Amelia

Amelia is a seasoned marketing professional with a wealth of expertise in our company’s core offerings. With an unwavering passion for driving growth and innovation, she plays a pivotal role in shaping our marketing strategies and enhancing brand visibility. A key aspect of her responsibilities......